Its 6.30 in the morning. A beautiful scene to capture from my naked eyes. The reason why I see this as beautiful because I am not a morning type person. I guess, last time when I have seen sunrise was 2.5 years back, if I am not wrong. This is when I got married to finish some early morning rituals on the wedding day.
Okay, so coming to the point and let me introduce these best 3 Makeup Products For Beginners To Complete Affordable Look.
From last 5 to 6 years, cosmetic industry has really boomed up themselves by introducing affordable products in the market. Some of them has luckily entered in the market by just launching their products at a very reasonable rate without hampering the quality though.
Okay, so enough blabbering. I know, all the above information that I have given has nothing to do with the article here but sometimes I wish I can talk to you guys through all my posts. I am learning this art.
Okay, let’s get into this.
Here I am giving you a beautiful piece of advice for all the beginners and teenagers out there who has planned a lot to invest in some makeup products but don’t know if their pocket allows them to do so.
Keeping in mind, that this article more belongs to all beginners or teenagers. That is why, I have chosen the products which are easily available and will be under the budget.
Well, one important advice here is to follow a proper skin care routine which helps you to achieve the perfect look every day. Of course, you must have heard about CTM method which is the basic thing to do before makeup. If you don’t know how to prepare your skin before doing makeup, then you must click here because this is very important which all Makeup Artists Swear by.
Here is the list of only 3 products which you can buy as per your undertones and shade you belong to.
You might find a list of makeup products in the vanity which helps you to achieve a flawless makeup. Those products are like Primer, Foundation, Concealer, compact, Loose powder, Eyebrow pencil, Eye primer, Eyeshadow, Eyeliner, Kajal, Mascara, Bronzer, Highlighter, Blush, and Lipstick.
Well, there could be more products like false eye lashes to make it more dramatic. Now, a days some strobing cream and illuminating creams and primers have come up in the market which you can apply underneath your foundation to make it dewy and glow.
Now, Of course choosing 3 products from them will be very difficult as to look flawless again. So, I have an advice here to all of you who finds this article helpful. Choose those 3 products which will help you to compensate for other two or three products as well. This way, we can achieve the same look with minimal products, and we are in the game.
1. Making a Flawless Base
Now to create a perfect base, we need basic four things-
- Primer – A primer is to give us the perfect canvas to start with.
- Foundation – We need Foundation next that suits the best shade with correct undertones (Cool, warm or neutral). The shade must be matched with the skin type we have.
- Concealer – We need a concealer to hide some of our imperfections. Come on, we are humans and we have imperfections on our face. Even actresses and dermatologists doesn’t have flawless skin. Its normal.
- Compact powder – We need compact powder to set them all so that it will stay at its place for longer time till the time we finish our event, hopefully.

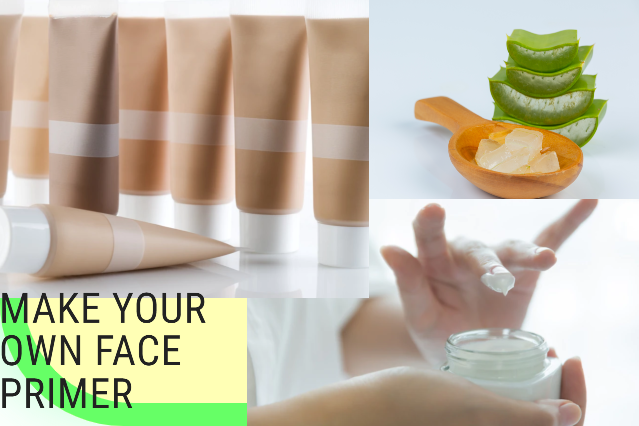
ADVICE: You really need not to invest on primers as you can make it at home as well. This home-made primer is much more secure and healthy for our skin. Believe me. If you need to know how we can make it. See here if you want to know how to make it at home easily.
Coming to the rest three products i.e. foundation, concealer and compact powder. We can replace them with one product and that is wet and dry foundation compact. It’s a 3-in-1 product that can be used as dry and wet as a foundation for naturally skin.
HOW TO USE:
You have two options to apply on your face. If you want a light to sheer coverage, then use it as a dry with a sponge which comes along with the product mostly. If you need a sheer to high coverage, you can damp your sponge and apply little by little product on your face and keep blending in. Blend till the time you get the desired intensity and flawless skin. Now, the beauty of this type of product is that it automatically settles down on its own after few seconds. Still, if you want to set your face, the use it again but dry this time. Try to apply it with light hands as we need the little amount this time in order to avoid cakey face.
TIP OF THE DAY:
You can apply two layers of this product on those areas where you have more imperfections like brown spots, dark circles, or any pimple marks or stubborn zits etc. Applying two layers will act as a concealer to some extent. You are a beginner, obviously you are not expecting a face like makeup artists used to do it.
My Recommendations:
LAKME Absolute White Intense Wet and Dry Compact – You Can Buy From Here
So, FIRST PRODUCT – Wet and Dry Foundation Compact.
2. Shaping up back your Face to make it natural
Now, after putting this all, you may find you face flat and without shape. People with no knowledge about makeup might even notice that you have put on something on your face which has ruined your natural beauty. It happens because we train ourselves on how to put more and more base but fail to regain the face back to its shape.
ADVICE: So, for this, you can pickup a multi-tasking Eye shadow palette which has at least these shades in it to make any look you want for any place you go – Black, Dark brown, Light brown, white or off-white, beige or skin color, orange, red, blue, and green.
HOW TO USE:
You can search for dark brown shade if you are from medium to fair skin tone. And apply this on Forehead, below cheeks (Start from ears and drag it till mouth or may be a little early than mouth), and jawline. Basically, you need to a make a 3 on your face. Follow this pic for your reference.
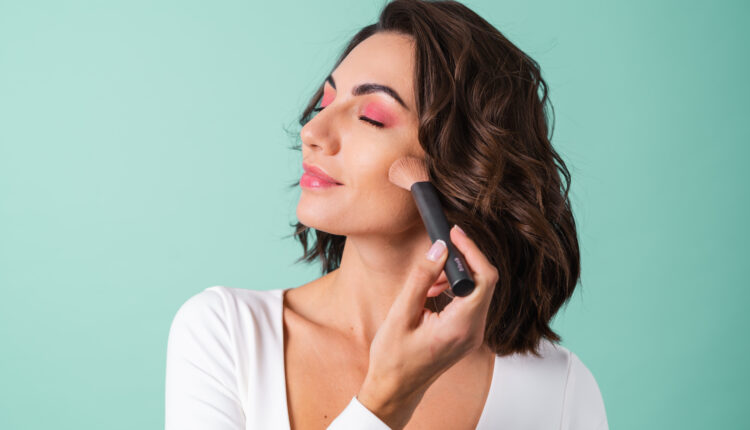
If you are someone who like a sharp and thin nose, you can contour a bit your nose as well. Remember, you must be doing this with light hands as less pressure will only regain its shape and does not ruin your entire face.
My Recommendations:
Swiss Beauty Mini 9 Pigmented colors Eyeshadow – You can buy From Here
So, SECOND PRODUCT – Eye shadow Palette
3. Adding Definition to your face
Adding definition is nothing but highlighting and working a bit on your natural features. When it comes to natural features, there is only one thing in your face that catches all. EYES.
Yes, defining your eyes and grooming your eyebrows can never go wrong to achieve a flawless face.
ADVICE: You can do it with the same eye shadow palette from which we have done our contouring in our previous step above.
HOW TO USE:
Defining your Eyes: Take the same eye shadow palette and you can use it as an eyeliner or even a winged eyeliner by choosing any shade you like. You need not to restrict yourself here to black or brown until and unless you have trained yourself enough to play with colors. This can be tricky, but you must give a shot to this. Also, put some shadow on your lower lash line and use it as a Kajal here.
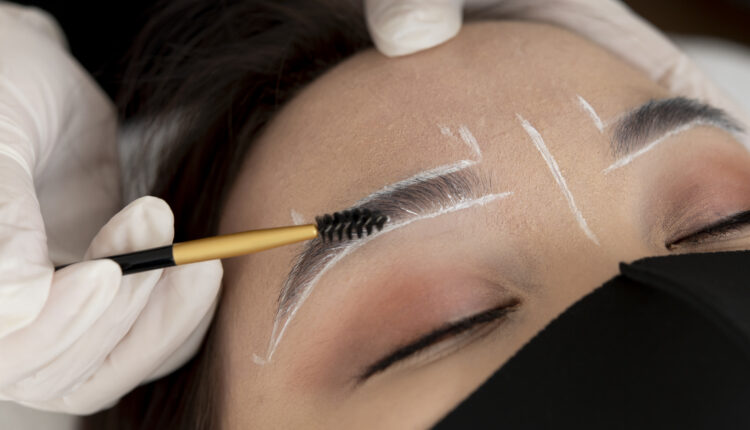
Grooming your Eyebrows: Take a shade from the palette which is closer to your hair color. It can be dark brown, light brown or black. You can groom your eyebrows with them by simply filling sparse areas. You need not to go a little further here as it can ruin the entire look. Obviously, you can practice more to become a pro. (Who stops you). Take this picture as a reference.
Highlighting your high points: You can take off white or white eye shadow from the same palette and apply on brow bone, cheek bone, bridge of your nose, cupid bow and on chin. Apply it little so that your face glows when light reflects on your face.
TIP of the day:
Use Brown color in your lower lash line if you have small eyes and black if you have big eyes. You will look good if you follow this tip. See the difference yourself by doing the same on both eyes at same time.
4. Its time to play with colors
Now, when we are done with perfect base with contouring, defining eyes and grooming eyebrows a little bit, it’s time to put back colors on your face to lift everything up for a fresh look.
You can all do that by adding vibrant lipstick and add some blush on your cheeks.
ADVICE: You need to choose that lipstick which can be used as a lipstick and a blush for your cheeks. Don’t worry, I am not experimenting this by saying so. There are many lipsticks out there in the market by some renowned brands who have come up with this kind of concept.
HOW TO USE:
We all know how to apply lipstick since our childhood when we use to steal our mom’s lipstick and damage it all by just rubbing right around our lips with no sense and art of applying it.
For cheeks, you need to grab your lipstick and take the product out on the tips of your fingers. Obviously, not on all fingers but limit yourself to first two fingers. Rub the product a little to give warmth of your body so that it will be applied seamlessly. Then just pat on your apple of cheeks and starts blending in. Blending means pushing the product away towards your hairline to give a nice shape. Also, this way, it will not sit at one place and spread evenly.
Tip of the day:
Use lipsticks from corals or pinks family so that they can be used on cheeks. As pink and coral are two most popular color to put on as a blush, no matter what which skin tone you belong to. Purpose of the blush is to give a fresh and healthy look.
My Recommendation:
Lakme 9 to 5 Weightless Mousse Lip and Cheek Color – You Can BUY From Here
So, third product is Lip and Cheek Color Lipstick.
With this, we have come to an end. Summarizing to all three products which you need is :
1.Wet and Dry Foundation Compact.
2.Eye shadow Palette
3.Lip and Cheek Color Lipstick.
I hope I have managed to give you what you all want to know before reading this article. I have tried to give you the best of my knowledge in a much smoother and simpler way.
Okay, now coming to the last TIP of the day.
Yes, I know there are few ladies out there who might or might not be comfortable with only three products in their handbags to achieve an entire look.
These two links are for you wherein you will find how to make your best makeup kit, and another link will help you in choosing the all makeup products within your budget.
How to Make Your Own Primer At Home
How to Become a Successful Makeup Artist

